
Remember when you had to read “The Outsiders” for school and there was that scene when Ponyboy recites that poem, “Nothing Gold Can Stay” to Johnny? C’mon, girl, you know you were bawling like crazy, even if you didn’t really understand the poem that well. Then suddenly you got it. The gold was your gold nail art manicure and you were lucky if it stayed on for two weeks. No wonder the poem was so sad.
But soon, you found a way to make that gold stay, and that was by immortalizing your mani in an Instagram pic. Apparently, you weren’t the only one with that idea. Soon Instagram was inundated with pictures of hands of all shapes and sizes modeling their gold nail art designs for everyone to check out in their unchipped glory. Here are some of those designs that deserve to win a gold.
All That Glitters is Gold
Whoever said all that not all that glitters is gold wasn’t talking about glitter nail polish. Anyone who knows nail polish knows that gold is only way to go when it comes to glitter. Clearly, whoever owns this hand is a woman of impeccable taste. This mani wins the gold for its subtle sprinkle of sparkles with a touch of iridescence. The squared nails provide the perfect palette for this glittery work of art.
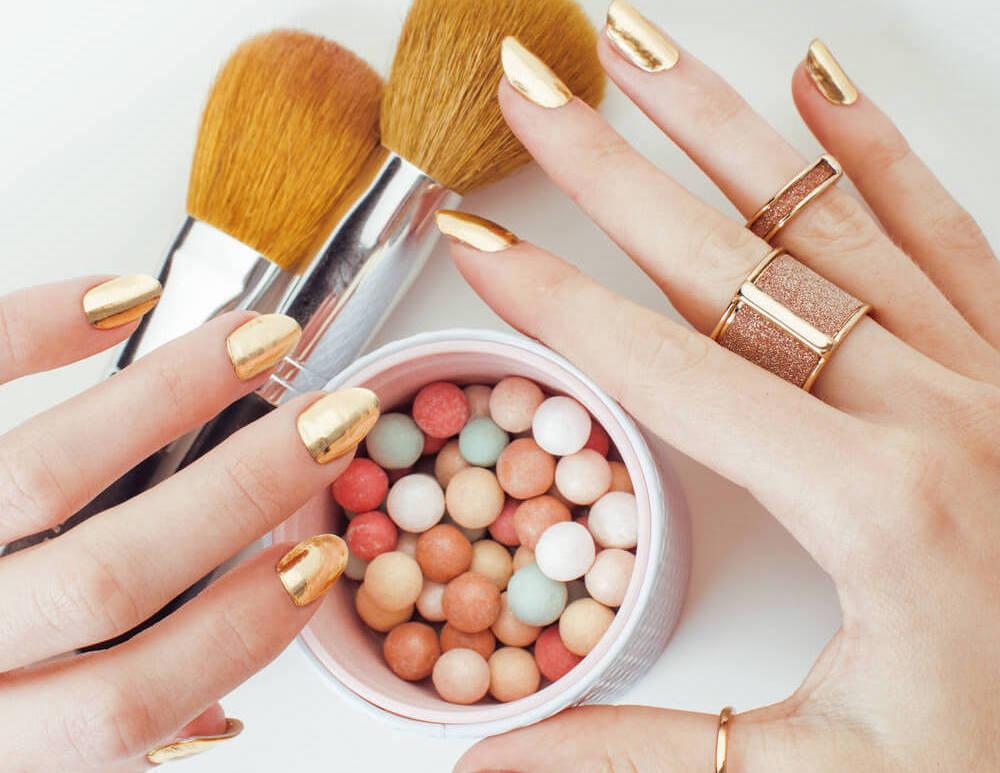
If You Liked It Than You Should Have Put A Ring On It
We’re pretty sure the Queen Bee was talking about a rock when she sang that song, but we’ll take this gold ringed manicure as a close second. This elegant contrast of an almost nude pink and a metallic gold ring is femininity personified. The perfectly rounded shorter nails add just the right touch of innocence and the alternating rims keep it interesting.
Golden Tipped Icicles
https://www.instagram.com/p/B0EW2PDlMRV/
What started as a French manicure turned into this? How could a manicure so wrong look so right? This is what happens when a nude pink base erupts into gold foil and ends in glass-like talons. Wear them at your own risk and maybe everyone else’s.
Out-of-the-Box Nails
Can you think out of the box and in the box at the same time? We’re still on the fence about it. But one thing for sure is that we’re mad about this gold plaid! Here’s how you can create this look with polish and nail striping tape:
- Begin by applying two base coats and two color coats to your nails (we’re loving the maroon and gold, but feel free to pick your own.
- Decide where you want the tape to begin and end.
- Gently roll out the tape across your nails, pressing lightly as you go. Leave a bit of tape to create an anchor at the end to stick to your finger.
- Once the tape has been placed, clip all the ends. Use your finger or a cuticle tip to press the tape down firmly.
- Apply a clear topcoat to seal in your look.
Dripping With Gold
https://www.instagram.com/p/B0TjAisn29A/
Festival-goers look no further. This manicure is sure to melt your mind. Drippy and trippy, this manicure features gold glitter melting from the base of a pink nail, frozen in time. FYI: You can replace the gold with red for a bloody look if you’re into that sort of thing. To get this look at home:
- Apply a base coat.
- Apply a coat of your color of choice.
- Add a matte topcoat to remove any shine
- Use a big dotting tool to create two or three drips of polish.
- Use a smaller dotting tool to connect the drips with curved lines.
- Fill in the empty spaces.
- Add a topcoat only to the part of the nail which has the dripping polish to give it a “still wet look.”
Seeing-Stars Nails
When you wish upon a star, wish for this manicure. We give these a gold star for cuteness, creativity, and overall cosmicity. If you want to give your mani the celestial vibe, you can make your dreams come true with some strategically placed nail stickers. Here’s how to do it.
- Prepare the nail by manicuring them and applying a thin layer of varnish.
- Allow nails to dry; touch nails lightly to make sure the polish is cured.
- Peel stickers off the backing sheet using tweezers.
- Place the nail sticker on by starting at the cuticle pressing forward to the nail. The sticker should be flat without bubbles or creases.
- Press the sticker down using the flat edge of an orange stick. Hold the sticker down for a few seconds to allow it to adhere to the varnish.
- Apply clear topcoat to nail stickers to keep them in place.
Egyptian Royalty Nails
https://www.instagram.com/p/B0cEklqgIbT/
When we saw these nails, even we were in “deNile,” but now that’s all ancient history. With Queen Nefertiti on one nail and King Tut on another, and a little touch of King Midas thrown in, this mani is Egyptian Illuminati certified.
Keepin’ It Real In Teal
https://www.instagram.com/p/B0PCGLXowdv/
Foiled again? With the popularity of the use of gold nail art foils, it looks like we’re about to be foiled rotten. We’re giving this mani the gold for its eighties art deco look, and bold use of teal, as opposed to the safer pink/pastel and gold color combo that we’re used to seeing (although we do love it). Foiler alert: we’re about to reveal the secrets to nail foiling. Read on for “aluminating” details.
- Paint nails with one coat of base color. Teal works well because it’s dark, it works well with gold, and, if the foil bleeds, it won’t be as obvious.
- Apply a second coat and let dry for a few minutes, but not completely. Ideally, nail polish should be tacky ( as in sticky rather than trashy, but you can do both if you like). Press a small piece of foil on your nails (cut in advance). Lift foil to make sure it has adhered, if not, press down for a bit longer.
- Repeat on all fingers. (Don’t worry if it doesn’t look Instagram ready. If the polish lifted in a few places, you can do a second coat of foil or a touch up with nail polish.
- Wait at least five minutes for foil to set and cover it with a layer of topcoat. Once the first coat dries, apply a second coat to even out the bumps.
Wild, Styled and Perfectly Filed
Good girls may go to heaven, but if bad girls get to wear nails like this, we’re up for a little corruption. From our wild, styled and perfectly filed collection, this manicure gets the gold for its class, sass, and unapologetic badass. With its old school leopard print and new school bling, it’s simply off the chain. Read on to find out how to get a fierce manicure in a domestic setting.
- Paint all of your nails with gold polish and let them dry completely
- Use black polish to make dots and your nails and allow them to dry completely as well
- Use a dotting tool to partially outline the dots you have previously made.
- Use the same dotting tool in the open areas to add small black spots to authenticate the leopard print look.
- Let the polish dry and apply a topcoat.
Everything’s-Coming-Up Tulips Nails
https://www.instagram.com/p/B0DKrtyhRll/
These tulips are just too cute. As soon as we saw them, we were blooming with happiness. The owner of these nails said she did them in a rush, we say do it during your next Netflix binge unless you’re a licensed professional. According to her post, it’s a pink varnish with gold foil (see above) and gold particles on the pinky and pointer and a gold varnish decorated with a dry brush method and stamps on the middle two fingers. For more on nail stamps, see below.
Getting Your Nail Stamp of Approval
The nail fail. It happens to the best of us. What begins with visions of a perfect hearts on your nails ends in vaguely decipherable blobs that you want to remove before the polish has time to set. If this scenario sounds familiar, nails stamps can turn your nail fails into nail triumphs.
To apply nail stamps, you need three things: a stamping plate, a scraper, and a rubber stamper. Stamping plates are metal plates with an image on the plate (tulips for example). You can use any type of nail polish except glitter which will stick to the plate and ruin the design. Thin metallics are the best choice. Here’s how it’s done.
- Start with the base color and wait for it to dry completely.
- Place the plate. Apply a different nail polish cover over it. Use the scraper to scrape off the excess.
- Lift carefully. To keep the image from blurring, take the stamper and roll it over the design in one smooth movement.
- Position your stamper over your nails so that the design is where you want it to be. Use a firm smooth movement to press the stamp on the nail. Work quickly so that your nail polish doesn’t dry. Apply your design by moving the stamper to the right and left across the nails. Once you are done, make sure your stamper is clean. Wipe it with a paper towel and move on to the next nail.
- Use the sticky side of a piece of tape to remove residue from the stamper, your skin, and your nails.
- Once you get your nail stamp of approval, apply a top coat to keep it sealed.
Long Strong Nails
Now that we’ve told you how to dot them, sticker them, stamp them, foil them, gild them and bejewel, we realize that we haven’t told you the most important thing and that’s how to take care of them. So before we start sounding too much like your mother, here are a few words about keeping your nails healthy.
- Don’t mess with the cuticle. Believe us, it’s an ugly scene. It won’t only make your cuticles look red and ragged, but it will also invite fungus and bacteria.
- Use nail hardeners sparingly. While beauty companies claim that nail hardeners strengthen nails, hardeners can actually weaken them. Healthy nails are flexible nails. Avoid anything that makes them brittle.
- Moisturize the cuticle and nail bed. It may not help your nails grow, but it will keep the cuticle looking healthy and protect nails from chipping, cracking, and breaking due to lack of moisture.
- Take biotin supplements. According to a study, supplements of biotin increase nail thickness and prevent splitting and breaking. To get the optimal effects, take 2.5 milligrams daily.
- Limit professional manicures. Now you know how to DIY your manicure, kiss professional manis good-bye. Research shows that women who get manicures are more likely to have dry brittle nails (most likely as a result of the harsh chemicals used in salons).
- Stay away from acetone-based nail polishes. They strip moisture from the nails leaving them prone to breakage.
- Choose nail tips over full extensions. More pretty ugly than pretty, extensions can cause fungal and bacterial infections. If extensions are an absolute must-have, opt for nail tips. Because nail tips cover a smaller surface area, the potential for damage is less than that of the full extensions.
- Avoid rough emery boards. Old school orange emery boards are too rough for nails. Use a fine smooth file and file in one direction instead of sawing back and forth to decrease the risk of fissures.


Leave A Comment